.
|
|||||
|
Happy New Year!
December usually has a combined effect on me. I’m winding down the eleven month “workshop tour” and with three weeks to renew, revamp, repaint unfinished works, plus preparing my January “start-up tour.”
My Spring Cleaning-the-studio begins in December. Personally, I also go through some introspection… About painting a new body of work, a new series, a veritable suite of crazy large pieces.
Plus, December is earmarked for new product development (a new Studio Chart), Paintings of the Month Club, reworking older paintings, writing and grandkid visits. Throw in the holidays, and I can understand why Prozac is so popular. I would be remiss if I didn’t mention another time-honored December ritual - So how many of you had grandchildren dancing in The Nutcracker? ALL OF US!
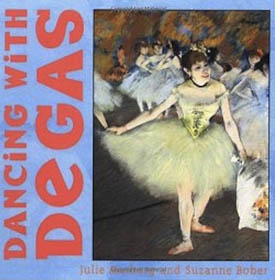
This is Sophia Burridge preparing for her ballet scene (she was a Bon-Bon). Her stage-gift was a book “Dancing with Degas.” A beautiful and simple poem book, augmented with many Degas paintings of dancers. You may already know about this series for children, which includes “In the Garden with Van Gogh,” “Sunday with Seurat,” and “Painting with Picasso.” Perfect books to read to your children and grandchildren!
Dancing with Degas by Julie Merberg and Suzanne Bober January started off with a Bang!
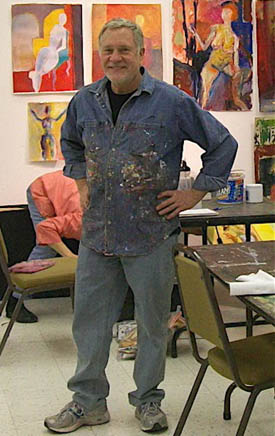
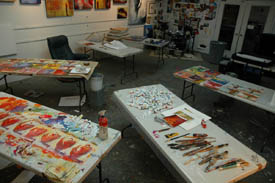
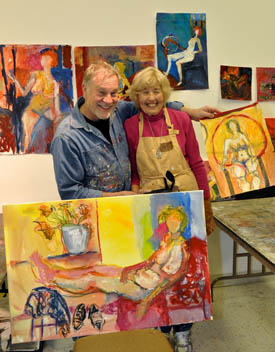
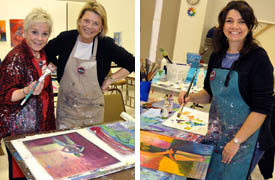
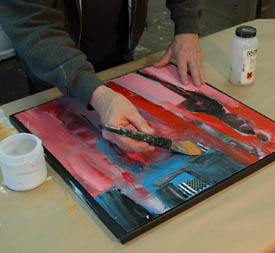
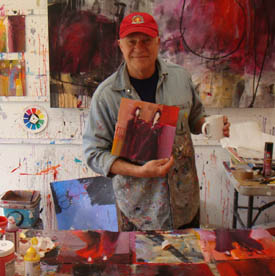
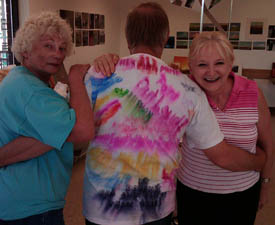
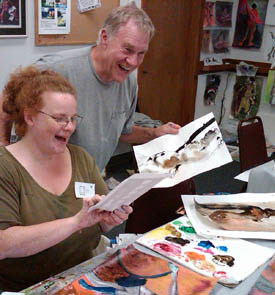
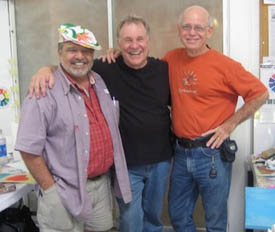
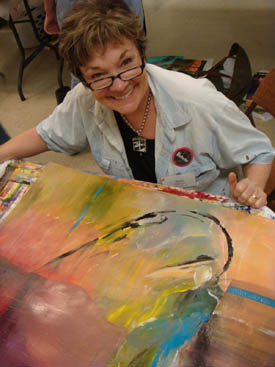
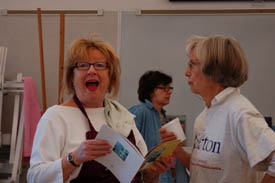
My first workshop was at the Palm Springs Art Museum, first week of January. It was a “Contemporary Artists’ Retreat” workshop with a prep day then two days of painting the undraped model, finishing up with two days of abstract painting and collage. Very productive class of sixteen painters from all over the US. The photos below show some of the painting students and their artwork!
I always enjoy going to the beautiful desert to teach... And I return to Palm Desert next month teaching a series of half-day workshops at the Art Colony. Here’s the info! February 3-5, 2011 Workshops in the Spotlight
Get your New Year Started!
2 days painting at the San Luis Obispo Museum of Art and a 3rd day painting in Burridge’s Studio in Arroyo Grande! Sedona, Arizona - Amazing location to paint! Omaha, Nebraska - The early bird deadline is February 1, 2011! Great Trips! - International Workshops - Please join us!
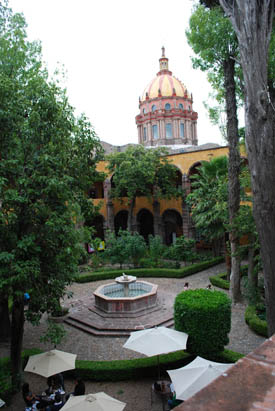
Paint with Bob in San Miguel De Allende!
We will be housed in a beautiful hotel with heated pool and tropical shrubbery, close to the art institute and a few blocks from the cathedral and town square. Breakfasts will be in the hotel and dinners at various restaurants. We’re on our own for lunches San Miguel is lots of fun because of gallery openings, cultural events, concerts, plays, and some outstanding restaurants. The weather is perfect.
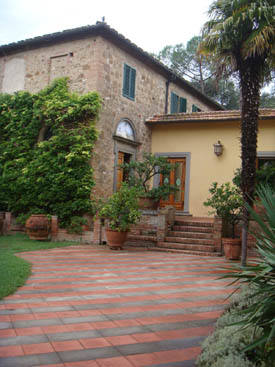
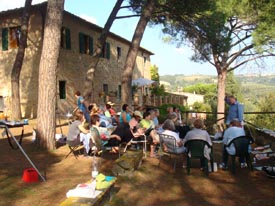
Villa Fattoria Bacio, in the heart of the Tuscan countryside. Between Sienna, Florence and San Gimignano sits the beautiful Villa Fattoria Bacio. The villa is the perfect blend of old world ‘rustica’ and catered comfort, surrounded on all sides by spectacular views of the meandering hills of Tuscany.
Seven nights lodging at the villa, nightly genuine Tuscan meals and fine wine are included. The five day workshop will take place Monday through Friday. We did this trip to Tuscany in 2009 - went to Florence for a few days before the workshop started - I highly recommend going to Florence at least once! Click HERE to view our Italy Trip photo album on Facebook. Contact Sedona Art Center (888) 954-4442 or (928) 282-3809 www.sedonaartscenter.com 2-for-1 New Year’s Special!
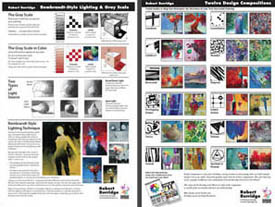
The Composition & The Rembrandt Chart Combo - only $14.95 We Want to Hear From You!
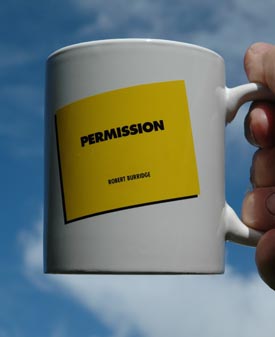
Keep those Studio Tips and your questions coming! If we use yours in an ArtsyFartsy Newsletter, we will send you a Burridge Permission Mug.
Bobbie from Michigan asks: Can I create a deckle edge after the painting is finished and the paint is dry? Or do I need to trim off the 2 of the deckle edges to make all 4 match? Dear Bobbi, Thanks for writing! Yes, you have to tear it - slightly cut the back side of the paper. Don't cut all the way through, just score it and tear it.
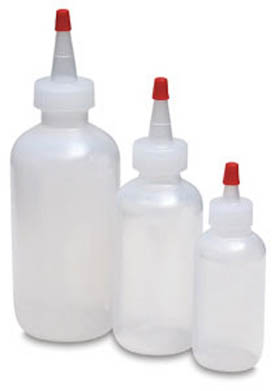
Thanks Bobbi, For your question on deckle edges, you get a Permission Mug! Louise from North Carolina writes - After attending your workshop in Norcross last spring I returned home and ordered paints that were packaged in jars. Being the messy person I am and always getting my hands covered in paint when I would set out my palette, 2 months ago I tried an experiment.
I purchased a plastic squeeze bottle with snap on lid. I poured the bottle 1/2 full of acrylic paint. I have been using it now for 2 months and it has not clogged or thickened in the squeeze bottle. Today I purchased 16 more bottles so I will no longer have to deal with the messy jars, plus it's much quicker to access my paints.
A number of years ago I saw a film of the famous glass artist, Dale Chihuly paint with squeeze bottles! To loosen up, paint with them. It can be a great drawing tool! Thanks Louise for your studio tip - a Permission Mug is on its way! Bob’s Studio Tip for Loosening Up!
Color Mixing on the table, not in the Painting
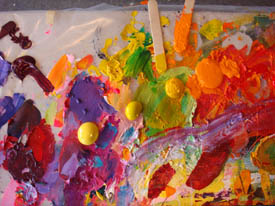
To stay loose, I work with a large palette… which is a six foot table covered with a 4 mil polyethylene plastic sheet. Securely tape the plastic sheet to the table. That’s my palette! Instead of a plastic tray with tiny troughs of color puddles surrounding a small central mixing area, I prefer large puddles of paint - and always bigger and looser brushes. I also premix custom colors in a wide mouth container. Paint is the only tool I have and I use a lot of paint! Also I have found that pre-mixing my colors on the table palette, the painting remains cleaner. Over-mixing on the painting surfaces, will cause a dull, muddy color. You decide.
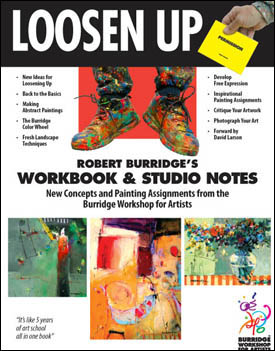
I have more tips for loosening up! Check out my Loosen Up Studio Workbook for more techniques to help you stay loose, relaxed and creative!
Click HERE for product information. Ask Kate about Art Marketing
This year I resolved never again to make New Year’s Resolutions. Let’s face it... New Year’s Resolutions don’t work! We set ourselves up for failure, making a list of unrealistic promises (Saying to ourselves: I’ll never do THAT again!) Then our self-esteem plummets when we break these resolutions. Instead of making New Year’s Resolutions, I am going to set goals. Yes, Goal Setting... In the 80s, I remember sitting in staff meetings going over our company goals: How to improve sales, how to increase visibility and how to inspire and motivate others. You may be asking, “How does this goal setting stuff fit into the life of an artist?” What is a goal? Simply put, a goal is a dream with a deadline! Without a deadline and a plan, a goal is a “dream.” A goal is something that you are willing to put time, energy and money into realizing it. A goal is something you are willing to focus on and work toward passionately. A goal is something you are willing to turn yourself inside out to accomplish! For example, a goal for this year might be “selling art.” You could decide how much art you want to sell; whether you want to go into high gear and make sales a priority, or whether you want to sell enough to simply buy more art materials. The choice is yours. It’s all how you state your goal. Here is a formula for effective goal setting that you can put into forward motion today. Keep in mind these 5 points: Here is a powerful goal: “I have a solo gallery exhibit in Los Angeles, California by 2013.” Now my job is is create the body of work, create a portfolio presentation, pinpoint and contact the galleries I believe would be a good fit for my artwork. Your homework for 2011 - Create a Goal!
Click HERE for top of page.
|
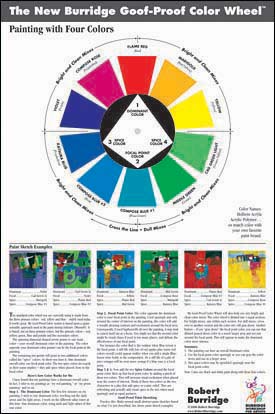
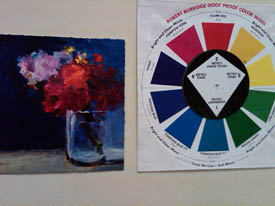
The Color Wheel - Again
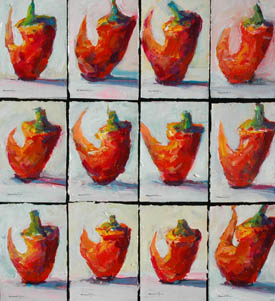
Neutral Tones and my Color Wheel Yes! For me, my neutrals are my colors grayed down. To make my colors pop I place pure colors next to the grayed down version.
Next, a three step summary of how my Color Wheel works:
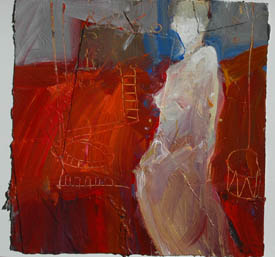
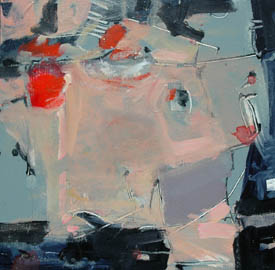
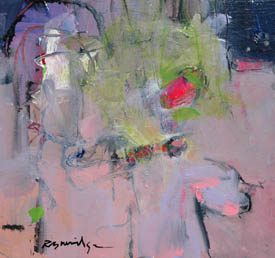
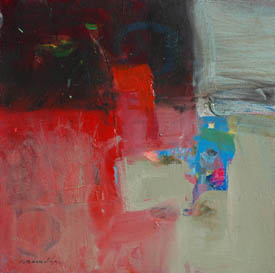
The above Four Paintings use the Focal Point Color & Neutrals So for me, Neutrals tend to be my colors dulled down. Lately I’ve been playing on the canvas with a strong, full pigment, saturated color for the focal point. Surrounded by a dulled mixture of its complement, which makes the focal point color more powerful. Mixing complements will dull the color… or instead, juxtapose the complements (not mixed together) and each color will appear brighter. Very effective! Assignment: How to Glue Watercolor Paper Paintings on Canvas
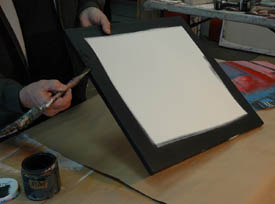
Special Note: I often demo this in my workshops and later get many emails wanting the step-by-step description of my technique of gluing watercolor paper onto a canvas. I thought this was worth repeating in the ArtsyFartsy News!
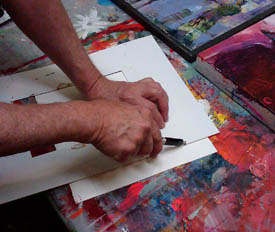
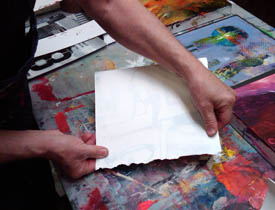
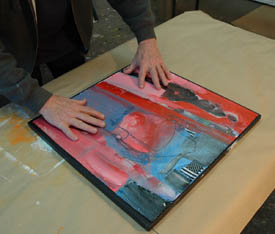
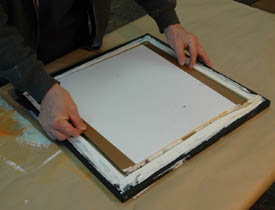
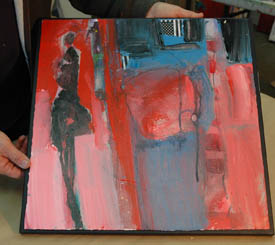
In my workshops I mostly paint with acrylic paint on watercolor paper. After a few months of teaching, I have many, many acrylic paintings on paper to frame for the galleries, festivals, etc. To save money, I figured a way to have a unique gallery presentation and get the job done fast. My thought was to glue a 19" x 19" paper paintings onto canvases. The canvas sides and the top edges were painted a color. The paper was then glued on to the canvas with a 1/2" canvas border (color) showing all around. The paper had a deckle edge all around and the end result was a totally cool “hand of the artist” presentation. Just think, canvases with watercolor paper glued on them. No frame, no mat and no glass. The gallery was delighted with the ease in hanging the canvas, no scratched frames or glass breakage AND no bothersome reflections. Now for the step by step. 1. I use 20" x 20" canvas.
2. I choose a neutral gray color and paint the canvas sides plus an inch or two all around the canvas front. Let dry.
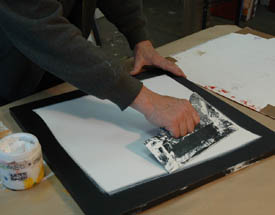
4. Using acrylic gel medium as my adhesive, I squeegee it all over the entire canvas surface and ALSO on the back of the paper painting.
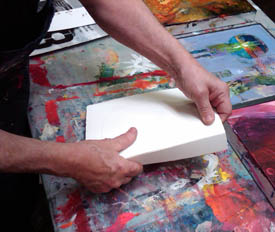
5. While both surfaces are still wet, I position and center the paper on the canvas, making sure the canvas 1/2" borders appear even all around.
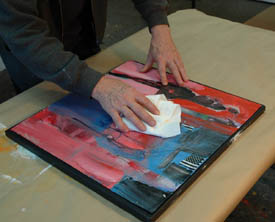
6. Using a large moist sponge or towel, work out from the center and squeeze out any air bubbles and excess gel medium, making sure the deckle edges are smoothed down as tight as possible. The exposed deckle edge gives the presentation a “crafted” look. I would never try to line up a 20" x 20" paper exactly to the canvas edges… because you can never have a perfect alignment with a flexible canvas. So I show the edge. It is what it is! I don’t try to conceal or hide the technique.
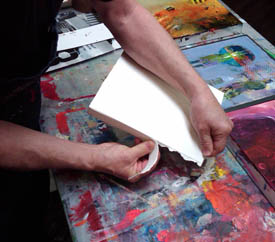
7. Under the canvas I stack foam boards between the stretcher bars to shore it up so the canvas doesn’t sag or push down in the center while mounting the paper.
8. Position a 24" x 24" plastic sheet (4 ml polyethylene) on top of the mounted painting. Next, I place a 24" x 24", 1/2" thick board on top of the plastic. Finally a weight, such as a cinder block or water bucket, goes on top of the board – to squeeze it all down. (Like pressing flowers.)
9. After 24 hours, I remove the weight, the board, the plastic slip sheet and lift the canvas off the underside stack of foam boards. The entire process results in a very strong adhesion of paper to canvas.
10. The final step – I brush on acrylic varnish over the entire top surface, including the canvas sides. The hanging wire is screwed into the back of the stretcher bars as usual. This may sound labor intense but the results are beautiful. It’s lightweight, no frames, no mats and no glass, and is very contemporary. You might ask, why not just paint on a canvas? As I said in the beginning, I have many, many paper pieces ready for exhibition and did not want the expense of framing every one. Hey, it’s only an idea I’ve tried and it worked! Try it out and see how you like it! DVD Review
If you are a painter, have been inspired by the Impressionists and wondered how this evolved, its connection with the arts and society, get this DVD. It belongs in every art group’s library. The presentation is of exceptional quality in film, images, research and production. After watching this program on PBS, I jumped on it and wrote this for every one of my ArtsyFartsy subscribers - it’s THAT GOOD! Oh, what a time, Hemingway, Gertrude Stein, Picasso, et. al. The esoteric and expatriate environment of Paris was the perfect storm for intellectuals to migrate to the cafes and studios to “solve the problems of the world.” Paris: The Luminous Years
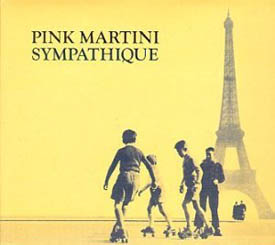
When I saw Paris: The Luminous Years on PBS one night - it really affected me! I wanted to embrace that exciting, jazzy time in my studio. Pink Martini is a vocal group, and use their voices like instruments. They have many CDs - Sympathique is one of their earlier ones but it had just the feeling I was looking for!
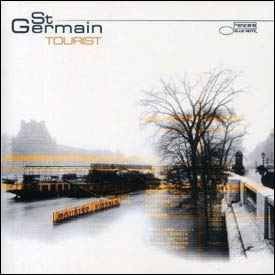
Sympathique by Pink Martini St Germain also runs the gamut from downtempo to electronic to jazz... Has been in my music library for many years!
St Germain Tourist Inspiration - Here’s to the Crazy Ones!
A few years ago I remember reading an advertisement for Apple Computers, proclaiming that they produce products for us who think and see the world differently. The photos in the ad were of Picasso, Einstein and Ghandi, pioneers who have gone before us, created alternative points of view and made significant contributions to mankind. It got my attention! Below is the ad copy which, I like to believe, speaks directly to us painters. Hang a copy of it in your studio. I dedicate this to all my Workshop Students, Friends and Colleagues!
To the Crazy Ones.
The round pegs in the square holes. The ones who see things differently. They’re not fond of rules. And they have no respect for the status quo.
You can praise them, disagree with them, quote them, disbelieve them, glorify them or vilify them. About the only thing you can’t do is ignore them.
Because they change things. They invent. They imagine. They heal. They explore. They create. They inspire. They push the human race forward.
Maybe they have to be crazy. How else can you stare at an empty canvas and see a work of art?
Or sit in silence and hear a song that’s never been written? Or gaze at a red planet and see a laboratory on wheels?
We make tools for these kinds of people. While some see them as the crazy ones, we see genius. Because the people who are crazy enough to think they can change the world, are the ones who do.
Copyright ©2010 Robert Burridge. All rights reserved.
For Email Marketing you can trust
I’m on Facebook!
Sign in to be my friend. Why, I even Twitter!
Recommended FB Fan Pages:
|
||||